


Darkroom Composites Posted On 26th May 2020 To Magazine, Learning Zone, Printing & Alternate

Introduction
I often see echoed this absurd idea that somehow film photography is more “pure.” Anyone who has ever been a part of a film photography Facebook group has surely come across a post along the lines of “how much editing in post do you think is OK with film?” And, without fail, there will be at least one response from the analog bourgeois which goes something like “if you’re going to edit *that* much, you might as well shoot digital. Why are you even shooting film?!”
Sadly, we often forget not only what is possible in the darkroom, but how much photographers used and abused darkroom techniques to produce stunning images that often bore little resemblance to the base negative(s).
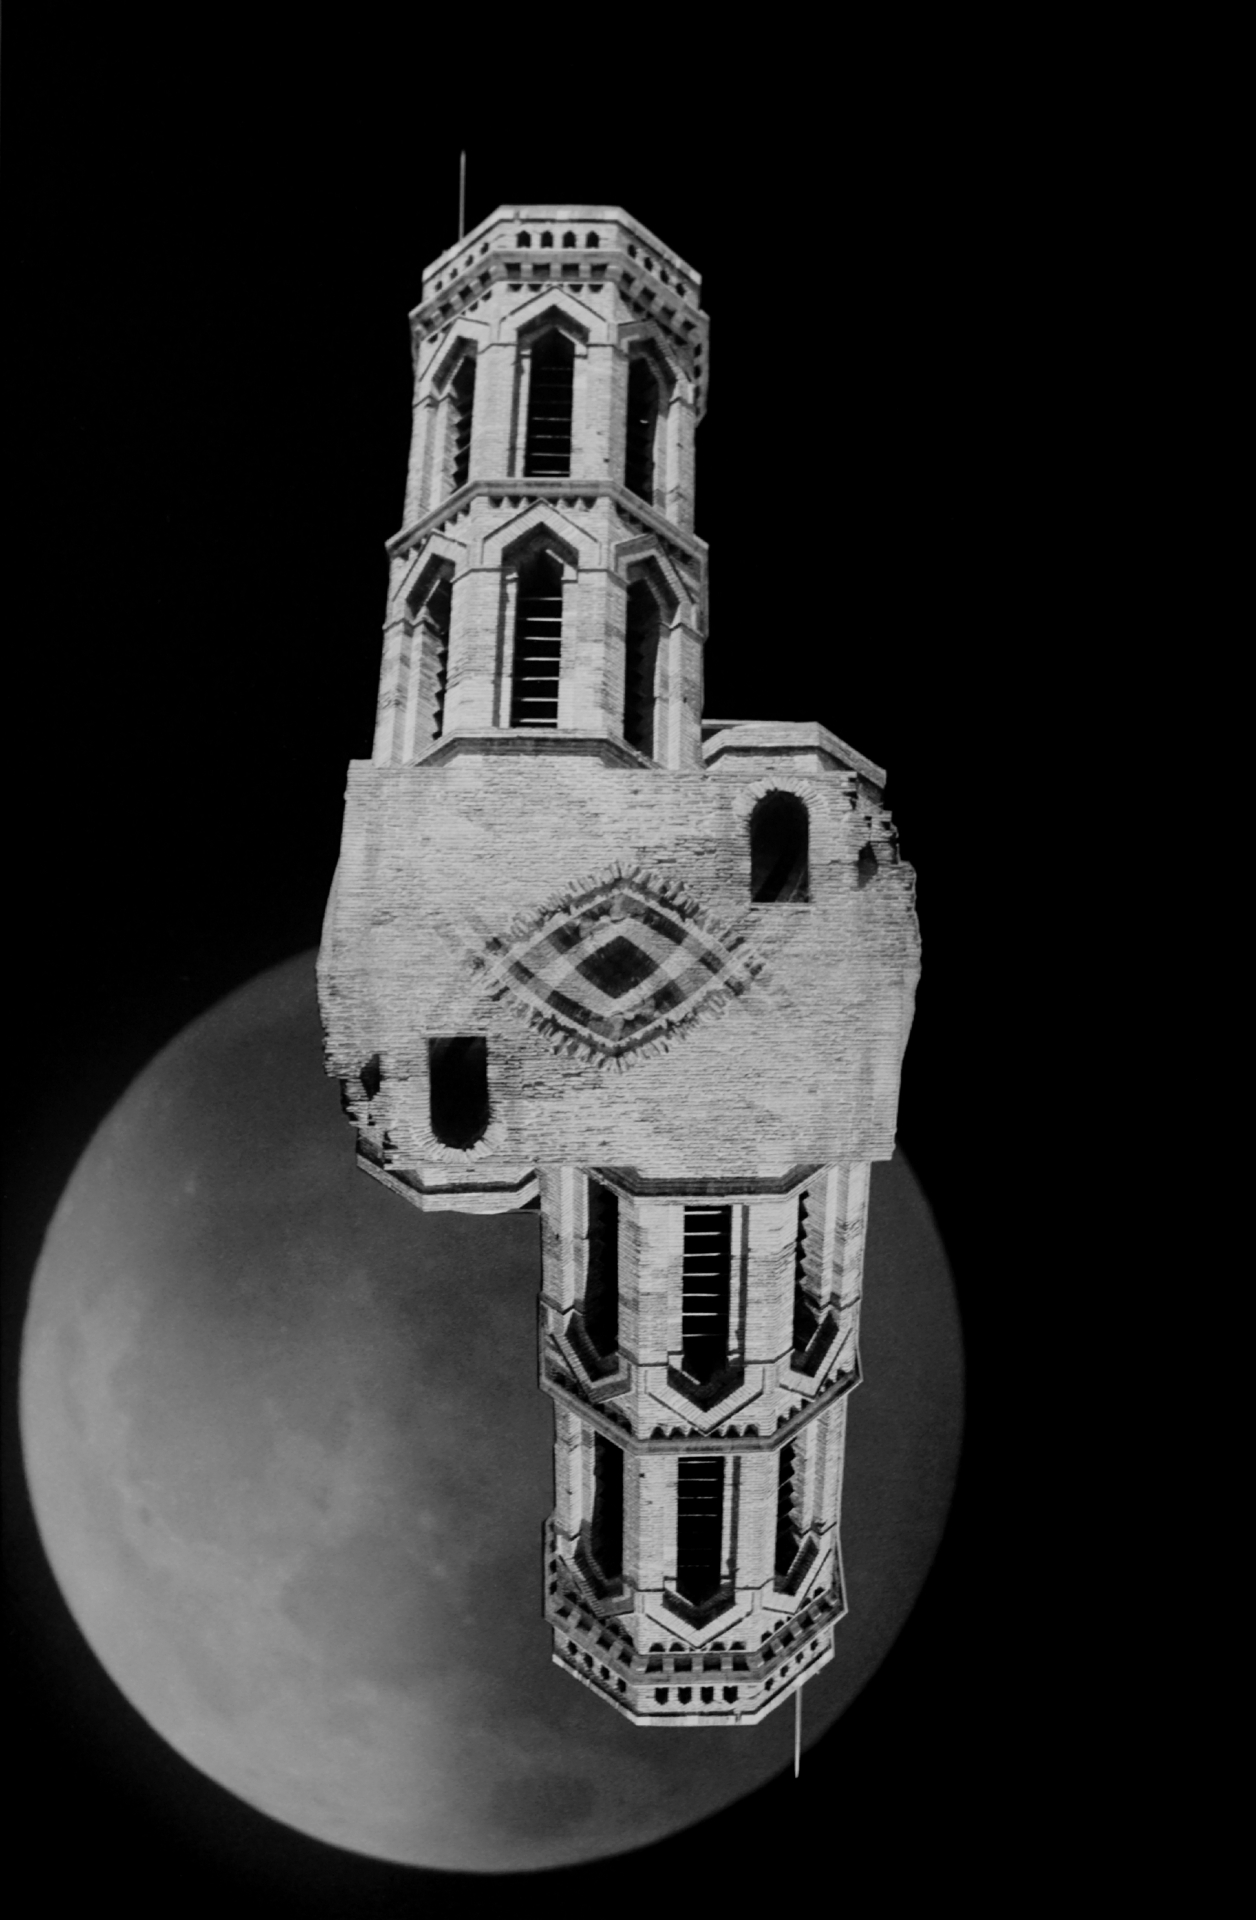
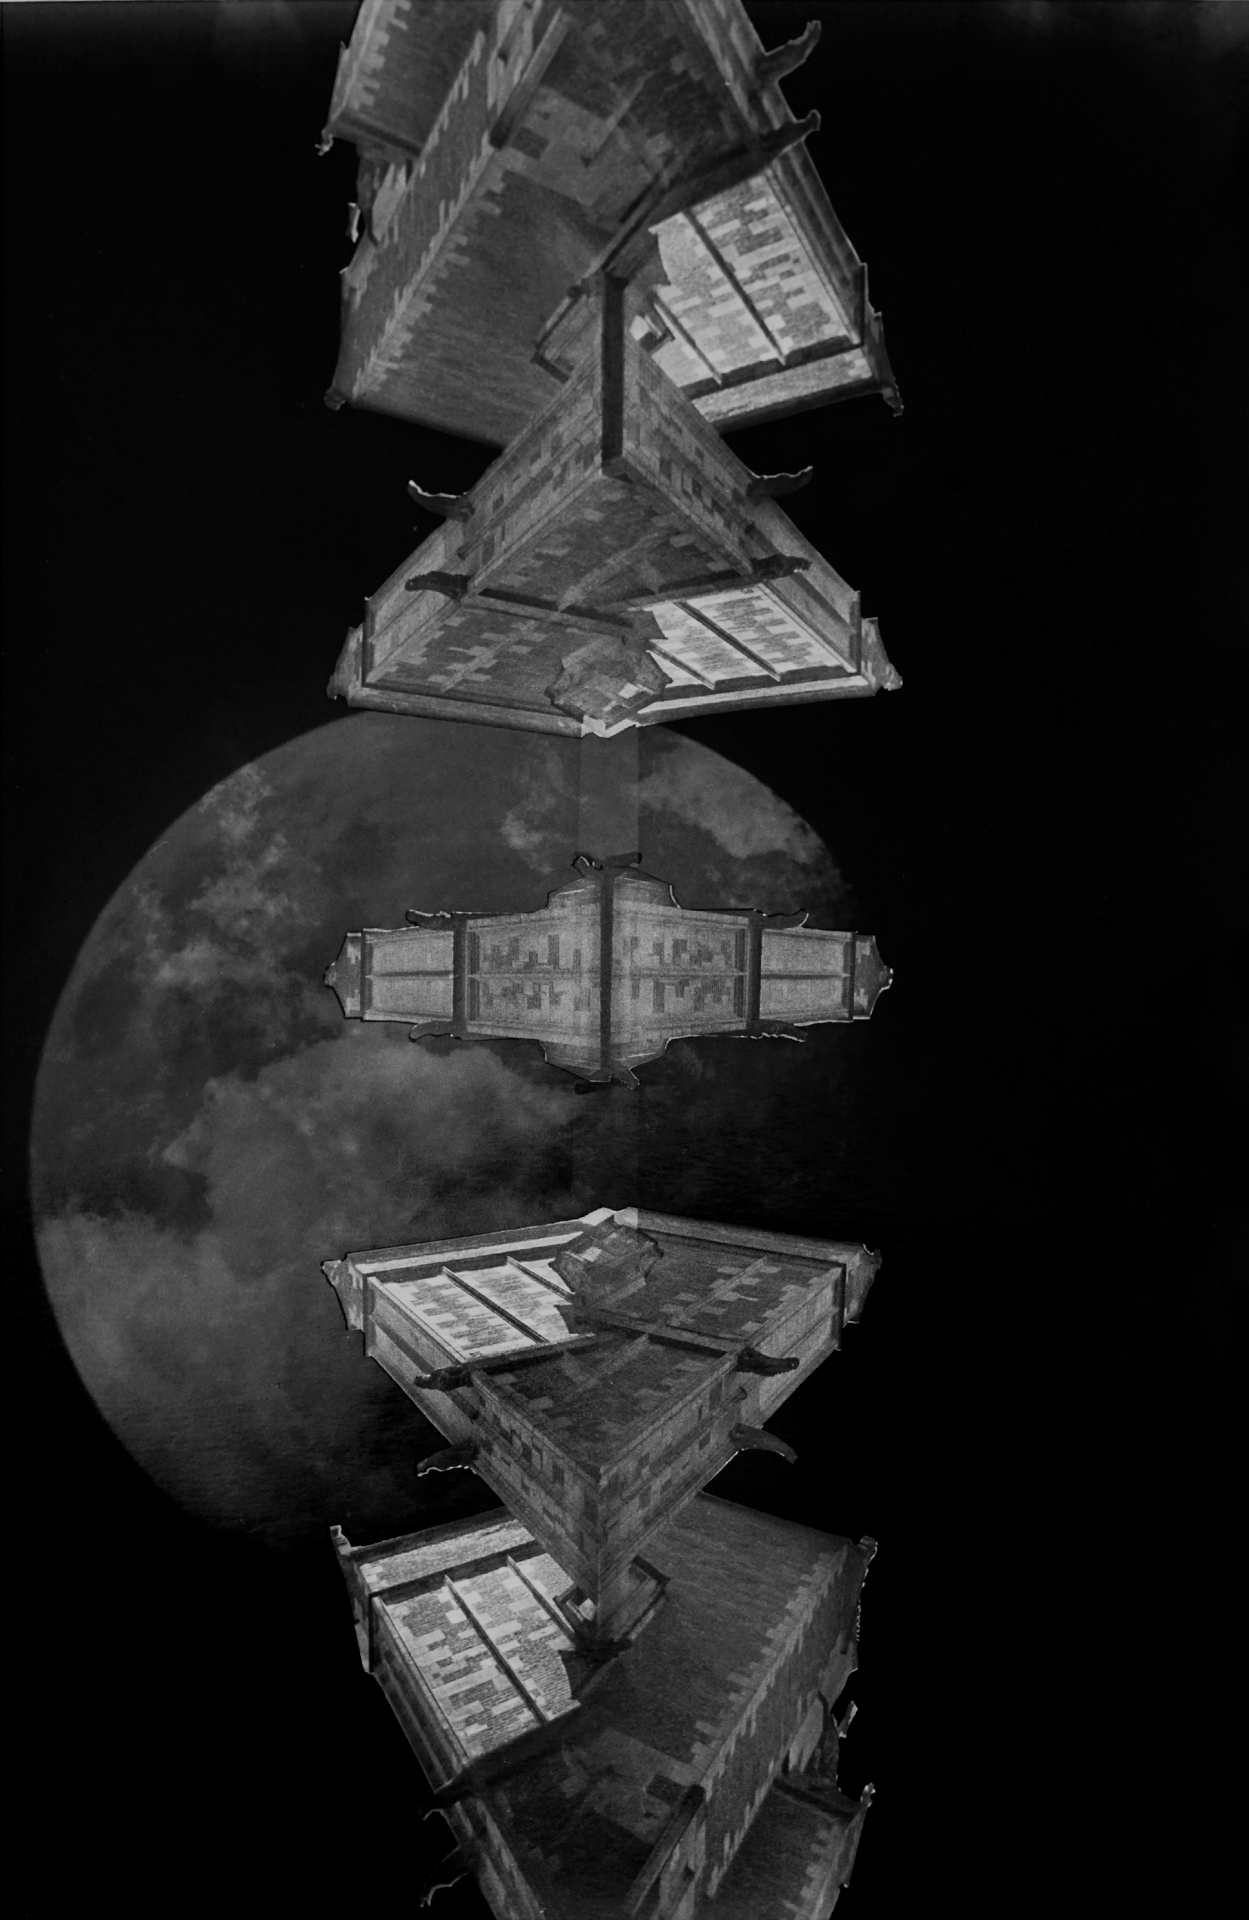
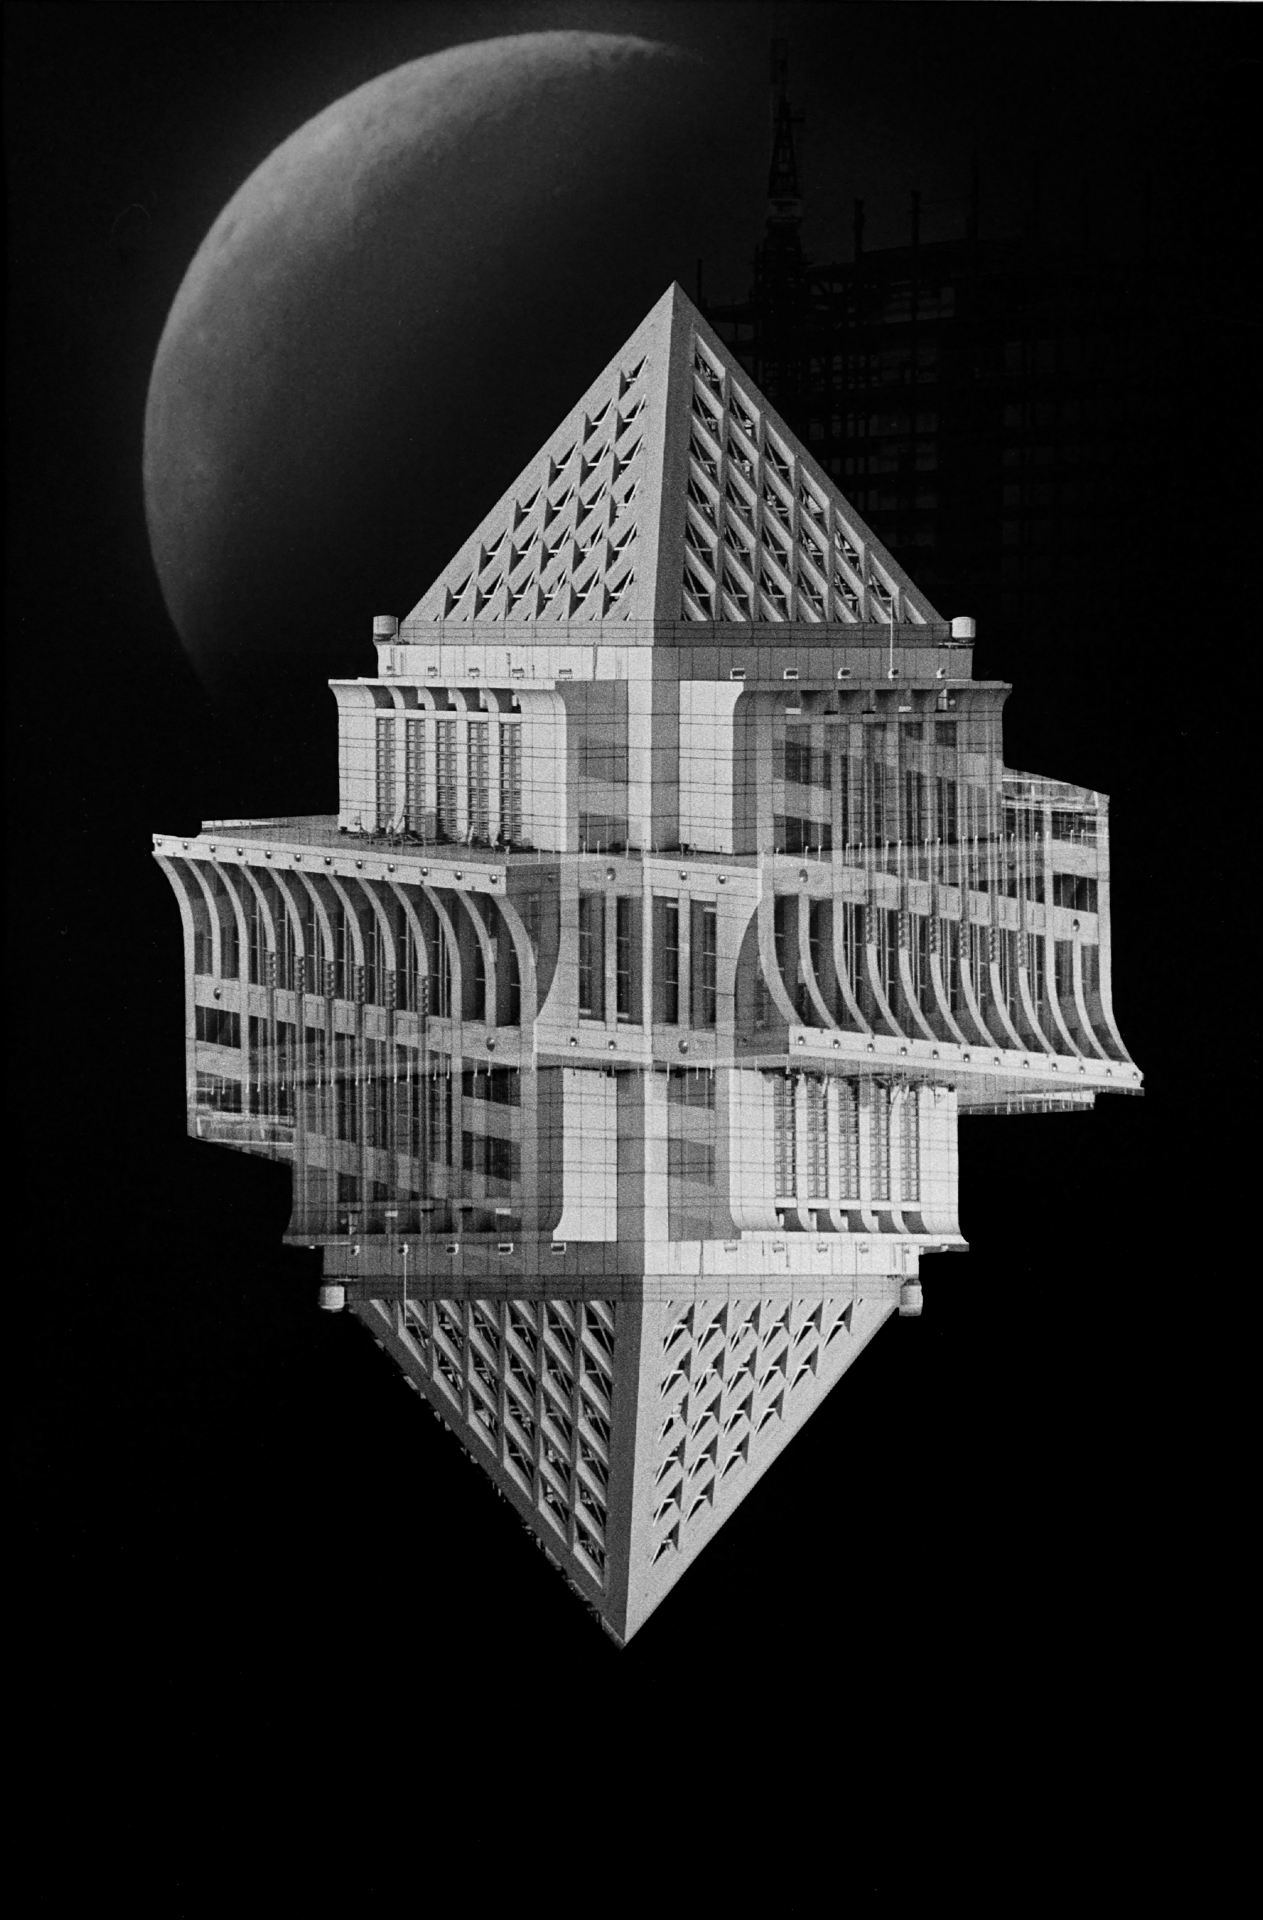
“Space Triptych: Split level | Fleet | Tesseract Kazoo” Moon negatives by Richard Davies
A digital-analog agnostic
I’m a digital-analog agnostic who chooses to work solely in the latter. And, for me, darkroom composites have proved to be an amazing playing ground. While there are almost unlimited possibilities afforded us in the darkroom, the technical challenges which come with a completely analog workflow make—for me, at least—an extremely rewarding final image. And, if there is any purity to be found in photography, let it be in making the images we want using the photographic medium(s) we choose.
Hopefully walking you through one of my composites will inspire some of you to play more in the darkroom. Or, perhaps, will encourage new shooters to play with their film images more in Photoshop, in the full knowledge that everything is permissible—that you can’t break any rules that were never really there to begin with.
-
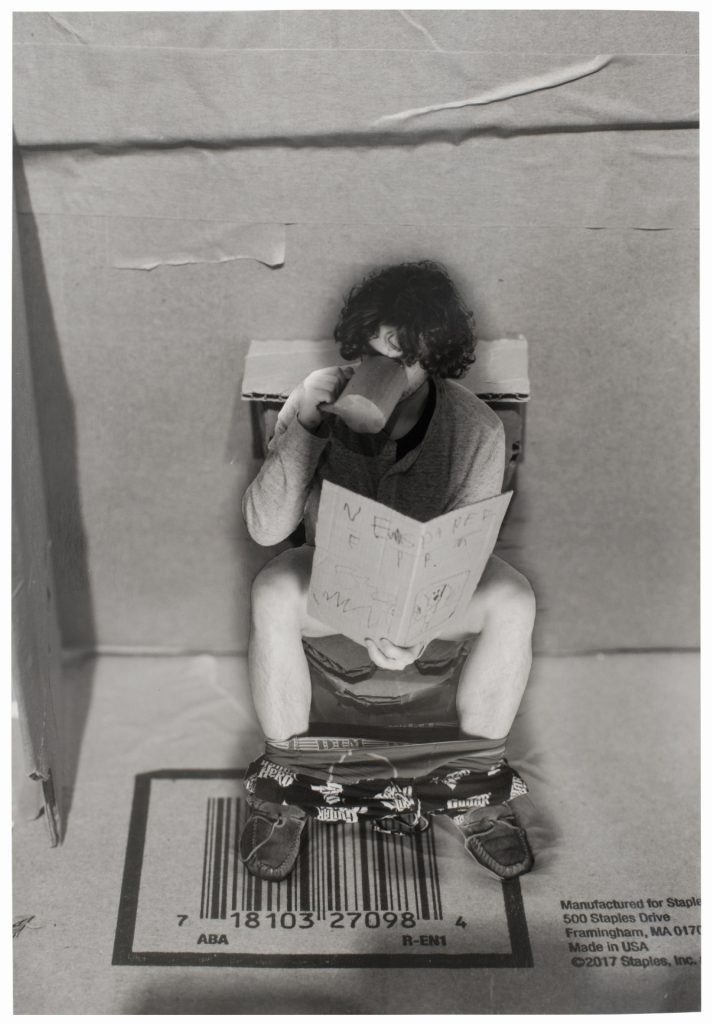
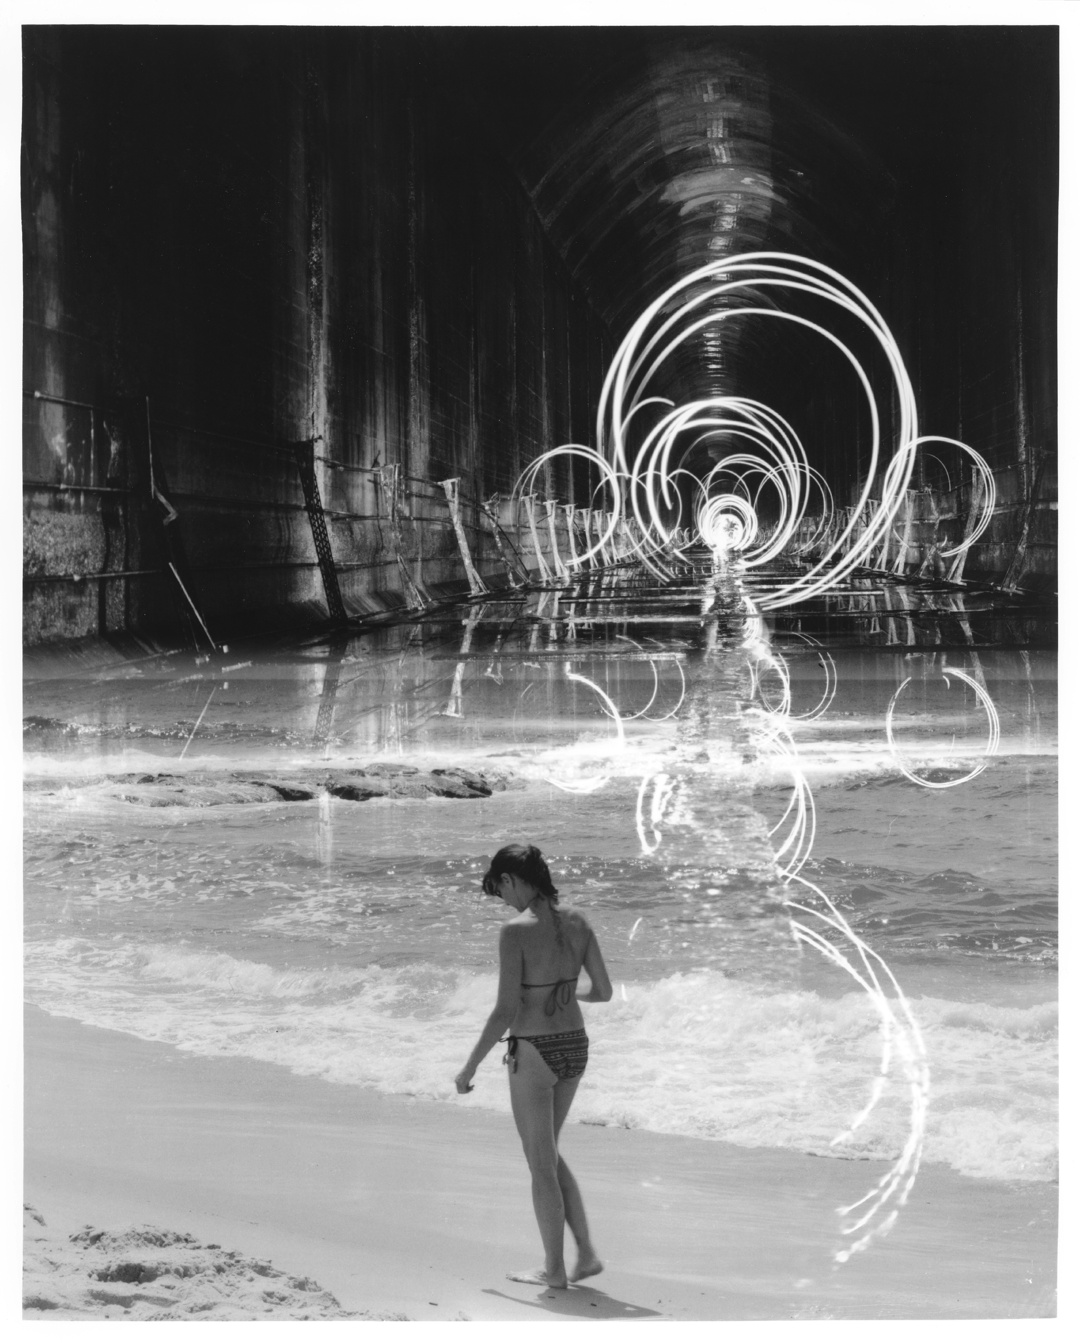
- “People say film photography is more ‘pure,’ and I’m over here like…” 2 negatives | FP4 PLUS @ EI500;
-
- “They’re coming for us…” 3 negatives | HP5 PLUS @ EI 1600)
Confinement composites on Glossy ILFORD FB classic
The Camera
OK, let’s get this out of the way—composites take more time than Photoshop in most cases. But, as is the case with all photography, the better you can set up your shot, the easier it will be in the darkroom. So much easier. Like, “no moving your enlarger head and refocusing several times while printing one stupid image” easier.
For these types of shots, I highly recommend a large-format view camera; or, at least, a medium format camera with ground glass. Also, a fine-tipped overhead marker, and a transparency. I cut my transparency to 4x5” and taped it directly to the ground glass.
Preperation
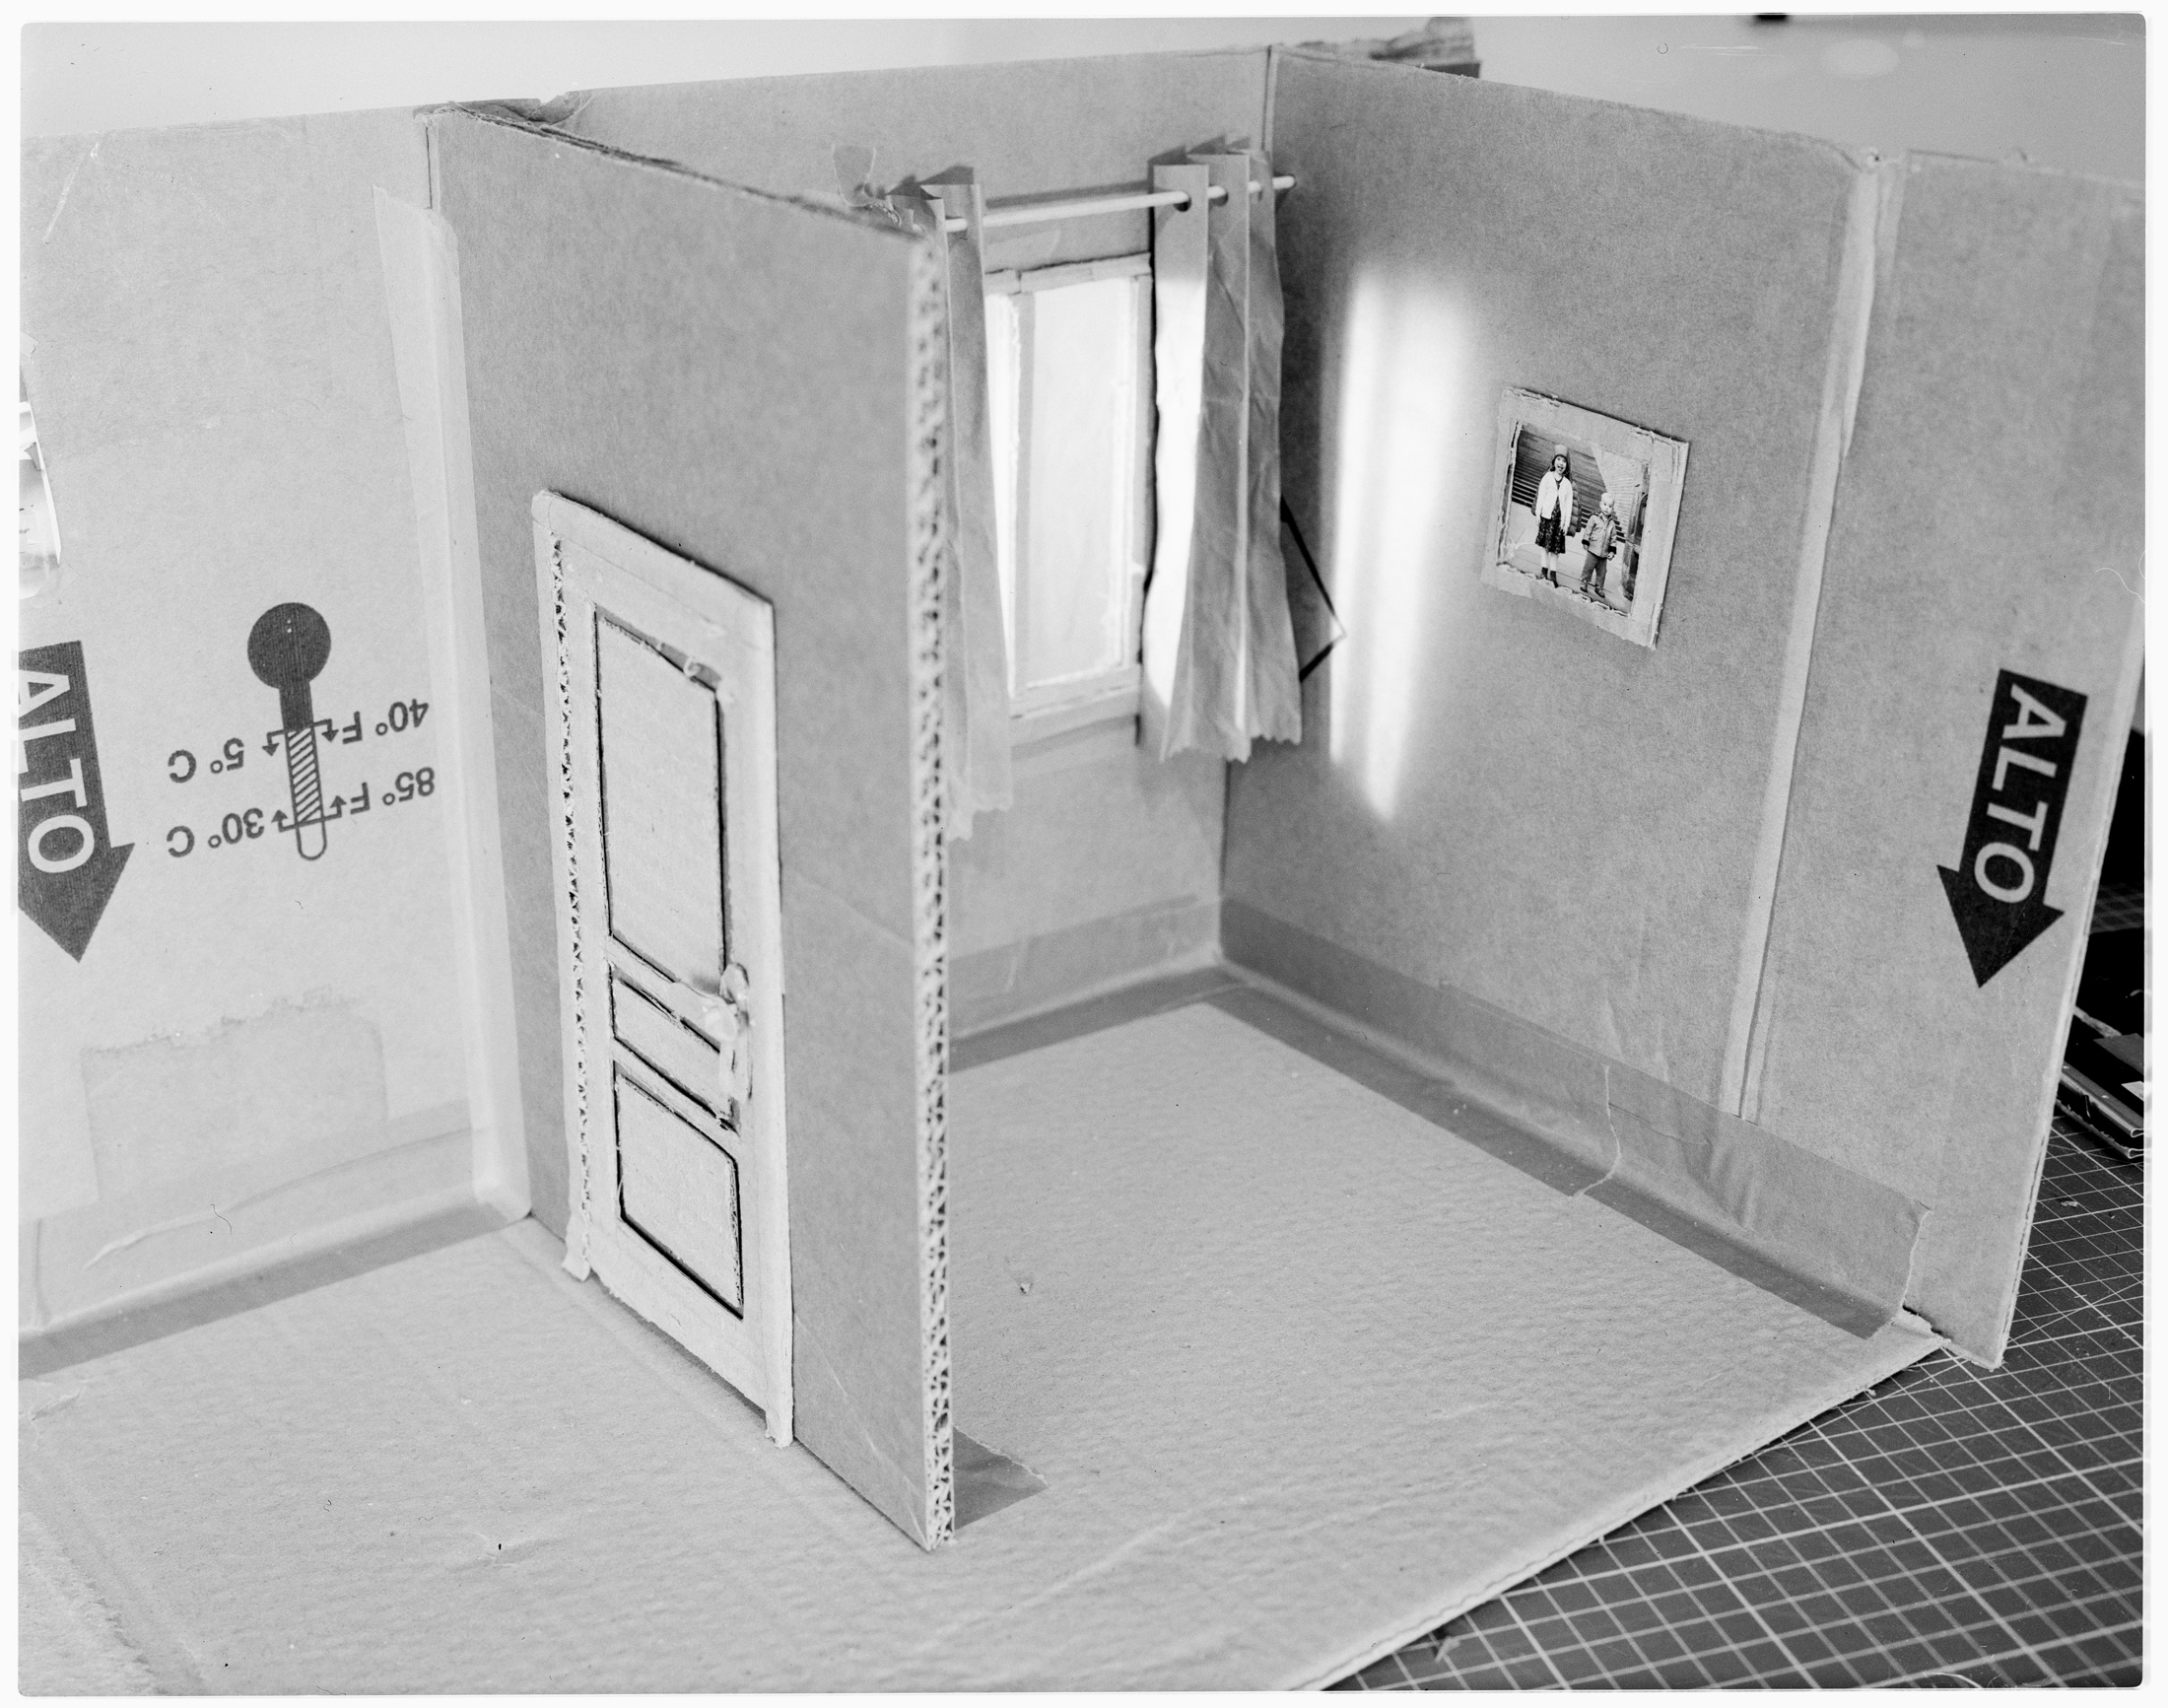
For this photo, I also sketched a scene before even creating the cardboard “stage,” so I knew roughly how I wanted to frame everything (for the record, I didn’t do that for the toilet photo… that one was straight out of the pot as it were). Then, I set up the camera to shoot the stage. (My wife made the curtains, which just made the scene for me:)
I wanted to be looking down into the scene to make it really feel like a doll house. But, and this is important, I had to keep in mind that I would need to maintain the same perspective when shooting both my wife and daughter. So, were I to take too high a perspective, I would have needed an impossibly tall tripod for the subsequent shots.

Perspective
For this photo, I also sketched a scene before even creating the cardboard “stage,” so I knew roughly how I wanted to frame everything (for the record, I didn’t do that for the toilet photo… that one was straight out of the pot as it were). Then, I set up the camera to shoot the stage. (My wife made the curtains, which just made the scene for me.)
Knowing that my subjects would be at the door and at a computer under the picture, I used a very little amount of front swing to make sure those two areas were in focus. Since it was almost a macro shot, depth of field was pretty shallow shallow even when stopped down. For this I used a 120mm lens.
The trick
Now, here is the trick, the thing that will saves me hours in the darkroom. I went under my dark cloth (or hoodie, as it were) and drew the scene with my overhead marker onto the transparency taped to my ground glass. This would later allow me to get the “people” shots in identical perspective.
Then, of course, I took the shot.
Making do
For the people, I knew I wanted everything around them to be white. This creates a “natural” mask to the negative, making it dark everywhere but where the people and their props are. I must admit, the whole ordeal would have been much easier if I had a nice white paper backdrop with no creases. As it was, I had bedsheets—fitted ones at that. We make do with what we have.
I switched to the 6x9 back on my camera. Since the people take up a relatively small portion of the scene, I knew I could get them onto a smaller negative—saving precious sheets of 4x5 film. I, then, taped my transparency onto the 6x9 ground glass so that I could put my models into the correct perspective,
-

- People HP5 ei 1600 1
-
- People HP5 ei 1600 2
and VERY IMPORTANTLY, the correct relative size for the scene. For the record, I had to raise my tripod about as high as it goes and switched to a 65mm lens.
Also, shooting 4-year-olds with slow lenses is hard. I blew through the 8 shots for those 2 negatives. (Thanks, BTW, to my EMULSIVE Santa for all the HP5 PLUS.)
The Negative
I wanted fastish speeds, and a bit of blown highlights to help reduce the creases in my fitted-sheet backdrop. So, in this case, HP5 PLUS at EI 1600 made the most sense to me.
When metering for similar in-camera multiple exposures I use a spot meter. That allows me to make sure that I can place my people in the shadows. In the case for these composites, however, I use an incident meter. It’s just a bit easier for making sure that I have the same exposure across negatives. Also, I’m lazy. Were I less lazy, I would have made the lighting in the composite scenes more dynamic.
I developed in Ultrafin T-Plus with constant agitation for 14.5 minutes, which seemed to do the trick. Oh, if only I had a proper white backdrop.
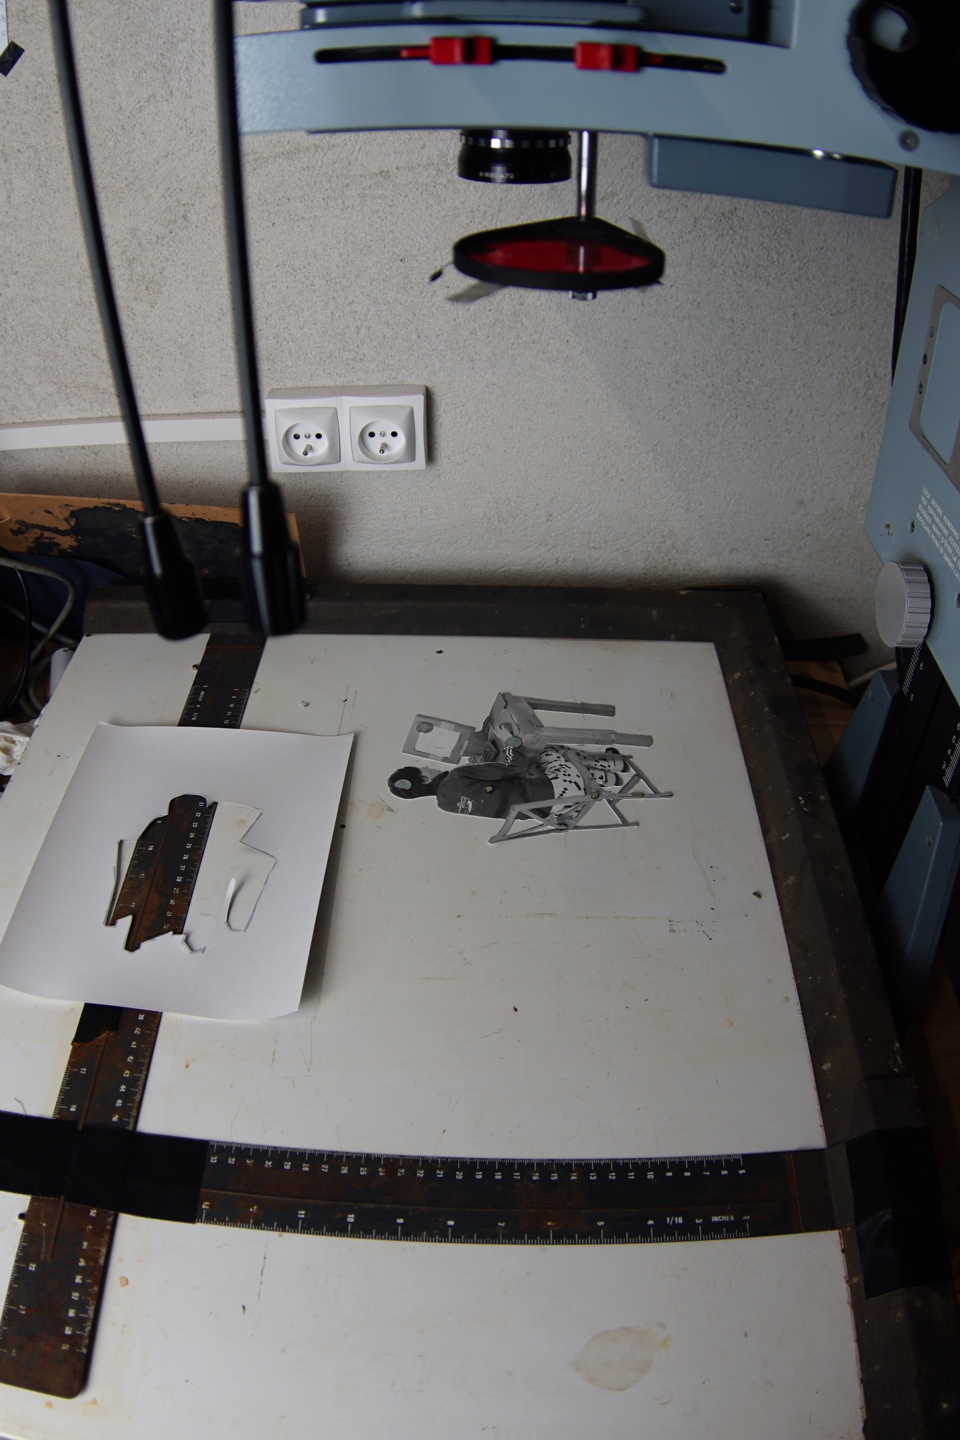
The Print
OK, here’s where things get saucy. Also, it took two days in the darkroom.
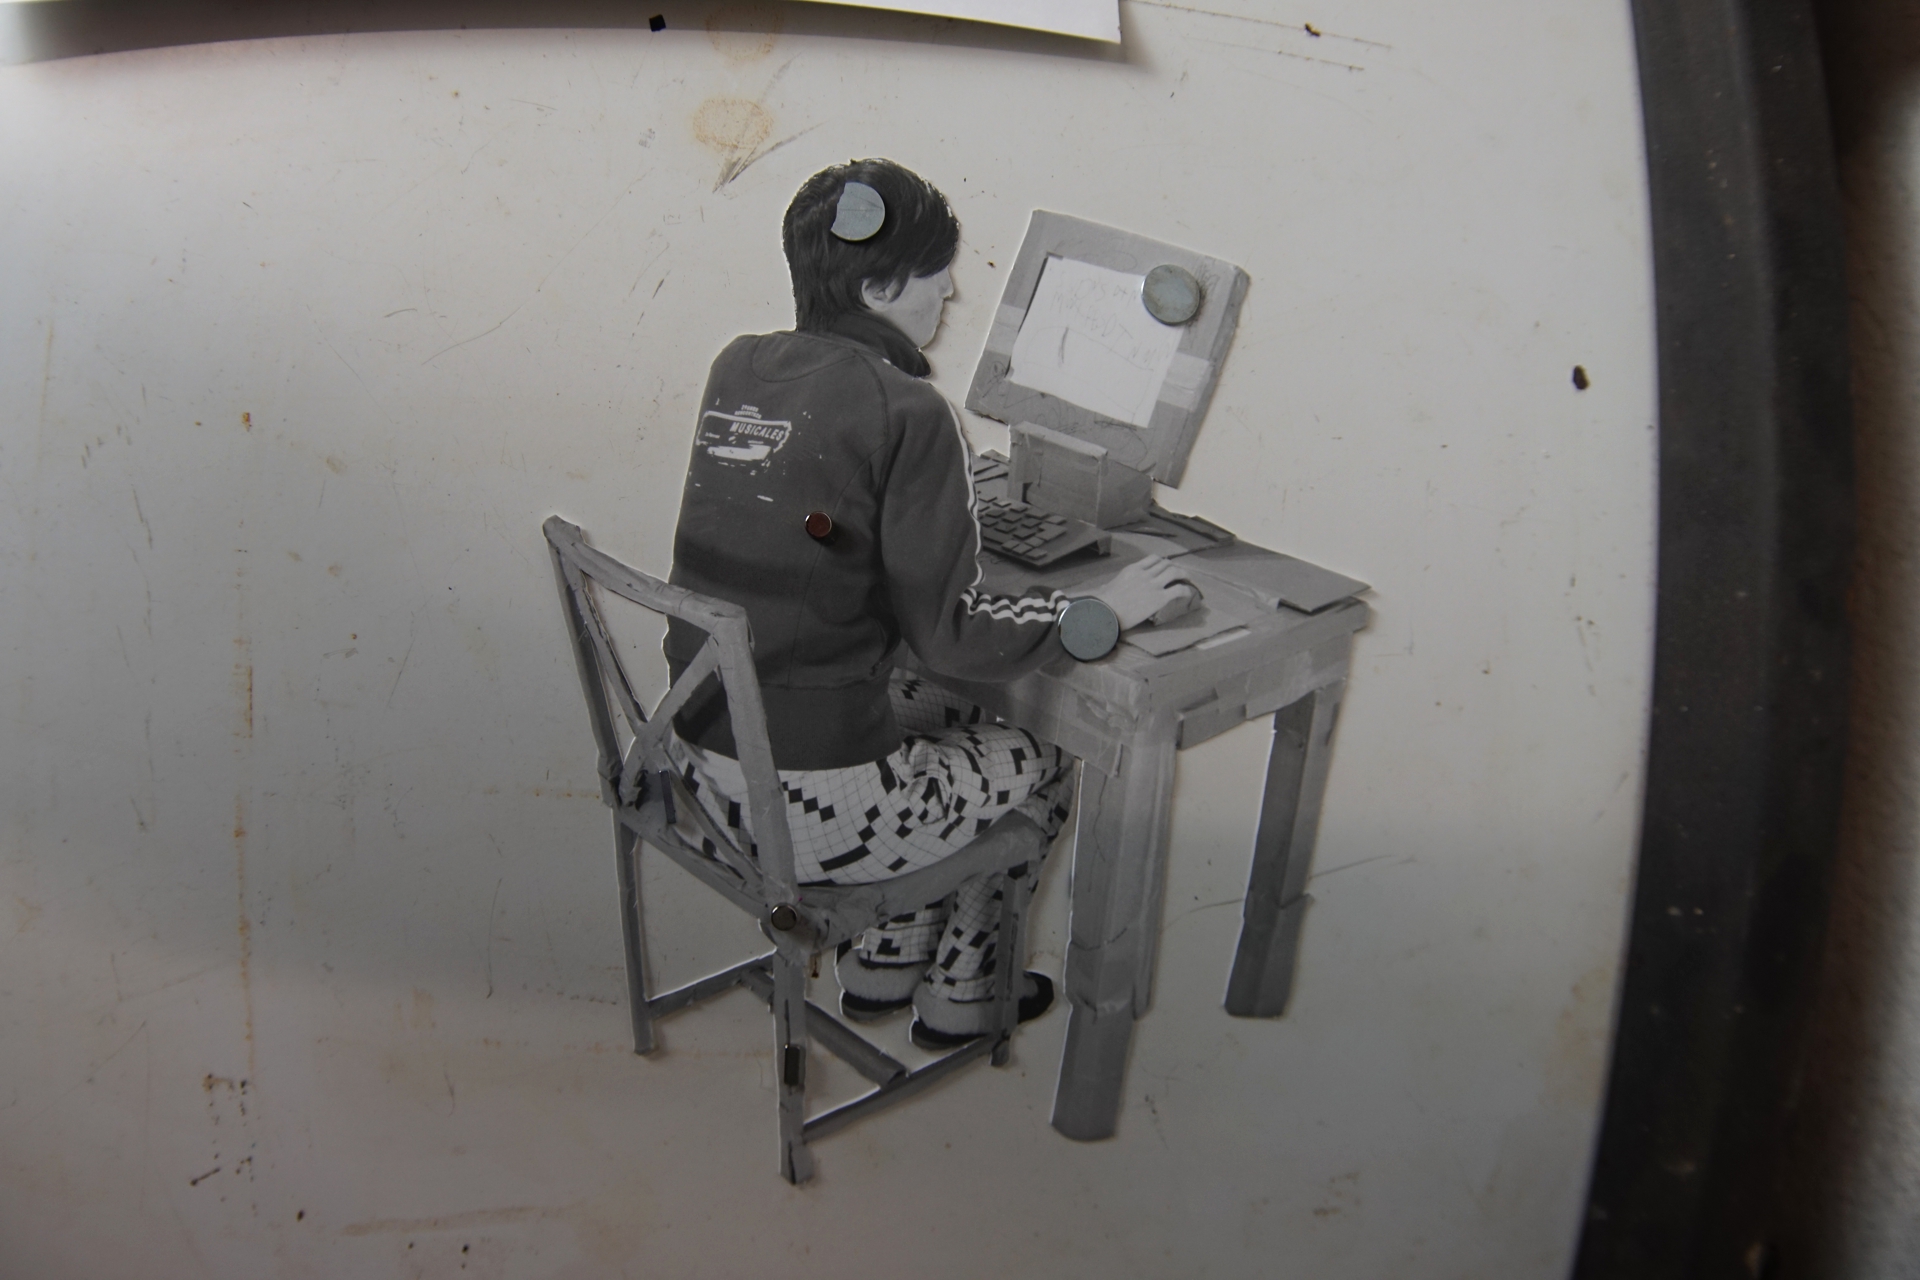
I choose my paper size (40x50 ILFORD FB Classic glossy, in this case), put the “stage” negative in the enlarger, and get it to the right size and framing. Then, since the people were shot to be the correct size relative to the cardboard house, I can throw them in the enlarger and know they’ll already be the correct size.
Then, I print each of the people negatives. While those dry, I’ll spend a day outside with my children, making very-possibly-dangerous see-saws out of any old wood, knowing that confinement is for the greater good. Once the prints are dry, I cut out the people any everything I want in the scene to use as masks.
I also make smaller masks for dodging the crappy fitted sheets out of the scene, and casting shadows where I want them.
I use magnets to hold the masks in place over the paper, the safelight filter on the enlarger to align the next negative with the mask, remove that mask, expose, rinse, repeat, pray.
Outtro
So, there it is—my three day (including shooting), in-house photo. Was it worth the time? For me, yes. Is it perfect? Nothing is.
I’ve come nowhere near to mastering the darkroom and its possibilities. For me, there’s so much still to discover, understand, and exploit in my work. So, I’m extremely grateful for this thriving little community of ours, and the companies who continue to make products so that I can keep moving forward in this once and future medium.
“Tank Top” | 2 Negatives. FP4+ & HP5+ on Matte FB classic | Tank negative by Simon Riddell
So, raise your glasses with me: Here’s to dollars and dollars of “wasted” paper. Here’s to learning, process, and making the images we want to make in the way we want to make them.
About The Author
David Allen
After dropping out of College to focus on video production and graphic design, I decided to become a strength coach. And, after deciding to no longer be a strength coach, I went back to college. This resulted in a Masters degree in mathematics. Now—while working as a freelance n’importe quoi—I am working in art
Find out more about David and his photography using the links below.