


How I Got This Picture - Ross McDaniel Posted On 11th February 2025 To Magazine & How I got this picture

In our latest 'How I Got This Picture' interview with Ross McDaniel, find out what led him to try something different to capture Arches National Park.
Image Title
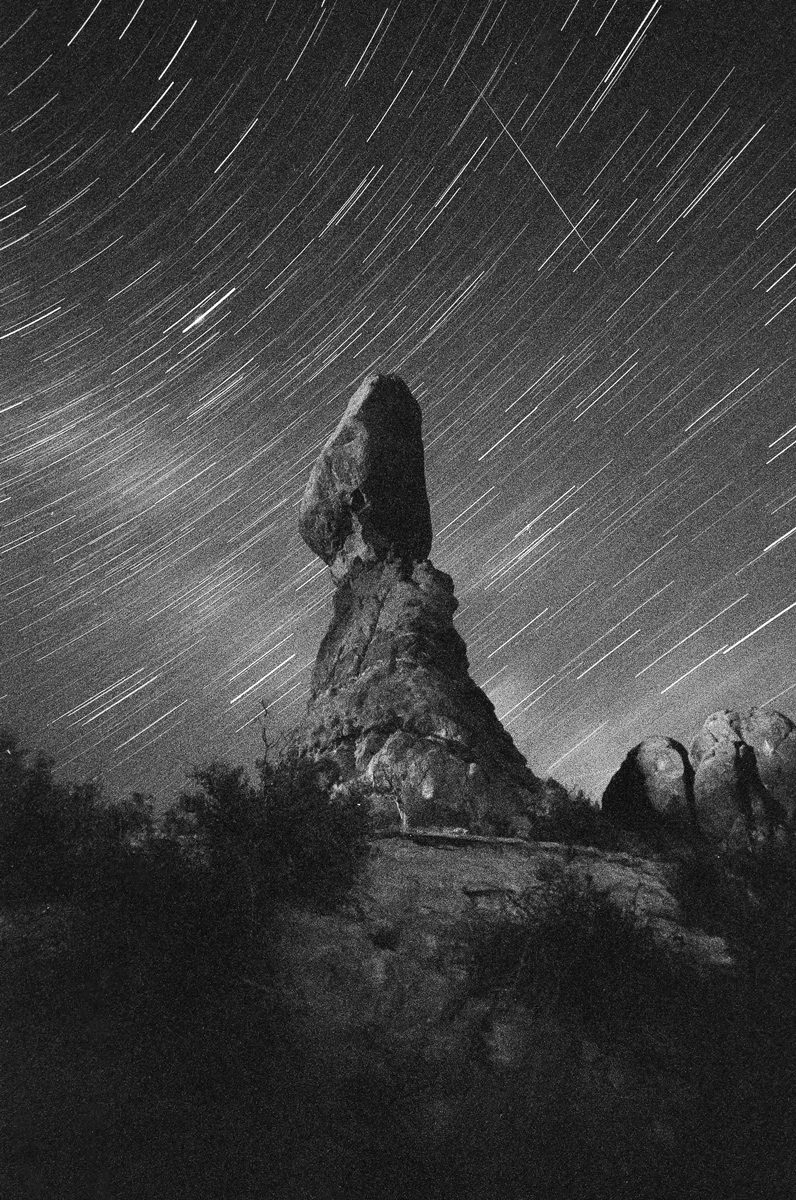
Monolith
TECHNICAL INFO
FILM USED
FORMAT
35mm
CAMERA
Nikon F5
LENS
Laowa 15mm F4
EXPOSURE TIME
30 minutes at f/4
Other Equipment
Tripod, Remote shutter release
LOCATION
Balanced Rock, Arches National Park, Utah, United States, Earth
FIRSTLY, TELL US THE STORY BEHIND THIS IMAGE. WHAT INSPIRED YOU TO SHOOT IT?
Arches National Park is known for its incredible landscapes, which have, deservedly, been photographed countless times. When I visited, I knew I wanted to try something different, which led to my decision to shoot on black and white film, and to research an idea that brought back horrible nightmares from orbital mechanics class…
The genesis for this idea came when I was looking at previous star trail composite images I’d created using digital cameras. Digital photographers create star trails all the time by taking hundreds of images throughout the night and then stacking them in a software like Photoshop. But I wondered if it would be possible to photograph star trails on film, using purely analog methods—where the trails would be captured onto a single negative with the shutter held open for an extended period. After far more research than was probably necessary, I discovered that it was possible – but would require careful planning and setup.
Balanced Rock was the perfect location for the story I wanted to tell. The park at night felt so otherworldly to me, and I drew a lot of inspiration from one of my favorite movies, 2001: A Space Odyssey. The giant desert monolith and the spiraling “stargate” sequence from the film were what I envisioned and aimed to recreate with this photograph. It was such a fun concept to do and experience to have as a photographer, and I hope to return to Utah soon to explore more of the awesome landscape!
DID YOU COME ACROSS ANY CHALLENGES?
Aside from getting pelted in the face with sand on a windy desert night… the most challenging part of this photograph was calculating how long to keep the shutter open. I had already selected a 400 ISO film, which was sensitive enough to capture the stars but could also be used for the remainder of the roll during the daytime. Next, I had to find the right combination of shutter speed and aperture to properly expose the scene.
From my research, I found that film photographers who attempted similar shots used shutter speeds ranging from 15 to 90 minutes. I realized there was a lot of flexibility and some creative freedom in deciding how long I wanted the star trails to be. This is where I go back to my comment about my orbital mechanics nightmares… I did some calculations to compare how long, in degrees of Earth’s rotation, the star trails would appear for each possible shutter speed. All the math was purely theoretical, and I ultimately had no exact idea of what the results would be, but I was very happy with my decision to go with a shutter speed of 30 minutes.
The last challenge I will mention… film has an attribute that is unique from digital sensors called “reciprocity failure”. This is a fancy way of saying that the film becomes less and less sensitive to light the longer the shutter remains open. Typically, exposure behaves in a linear relationship – if you double the shutter speed, you need to double the aperture size to achieve the same exposure. However, with extremely long shutter speeds, this principle no longer holds true, and the necessary settings become more unpredictable. The good news is that it is fairly difficult to overexpose a long exposure image. With this in mind, I felt more confident that a 30 minute exposure wouldn’t result in a completely white image, which wouldn’t have made for a good magazine entry.
WHAT PROCESS DID YOU USE?
Once the math and research was out of the way, the rest of the process was relatively simple. My friends and I arrived at Balanced Rock at sunset, so I was able to scout the exact spot for the camera before it got too dark. I used my Robus tripod with a ball head and weighed everything down with my camera bag.
I waited until after astronomical dusk to start the exposure. However, I didn’t want to wait too long, as the moon would rise three hours later, and I wanted no additional light in the sky. After metering one last time and feeling good about my settings, I used a remote shutter release to trigger the camera. The nice thing about the Nikon F5 is that it can program a 30-minute exposure, so I didn’t have to manually time the shot using bulb mode.
Balanced Rock is right off a main road in Arches National Park. While the photo was being taken, many cars drove past, occasionally casting headlights onto the rock. This is something I knew about ahead of time and got lucky that there weren’t too many cars that overexposed the image. I chose not to do any light painting to the foreground because of this, but I likely would have if I was in a remote location without those external light sources.
The best part about taking this photograph was that once everything was set up, my friends and I enjoyed some amazing stargazing in one of the coolest places on Earth.
HOW DID YOU PROCESS IT?
The negative was developed and scanned by Reformed Film Lab, in Ormand Beach, Florida.
WHAT ABOUT PRINTING?
I print all of my digital prints onto a fine art German etching paper. When I finally do get to do analog prints, I’m hoping to use some ILFORD Pearl!
Image ©Ross McDaniel
About The Author
Ross McDaniel
Hi, I’m Ross! I grew up in the southeast United States and loved to be outside more than anything else as a kid. I took an interest in nature from a young age, but it wasn’t until college that I took the dive into the world of nature photography. I started out by taking close-ups of ants with my iPhone and showing them to friends and family. I loved to watch their reactions when they saw close-ups of the ant’s eyes, or hair follicles – things that they hadn’t ever seen before.
While my camera skills and equipment have much evolved since that time, the reason I love photography hasn’t. My goal is to share stories that show people things they have never seen before – or could never see with their own eyes.
Today, I shoot almost exclusively on film. Using analog methods for nature and wildlife photography is a tremendous challenge, but the superior color, dynamic range, and overall photographic experience is well worth it!
Website: https://rmcdanielphoto.com/
Instagram: @rmcdanielphoto
Facebook: @rmcdanielphoto