How I Got this picture - Sergio López Ferrer Posted On 8th January 2021 To How I got this picture

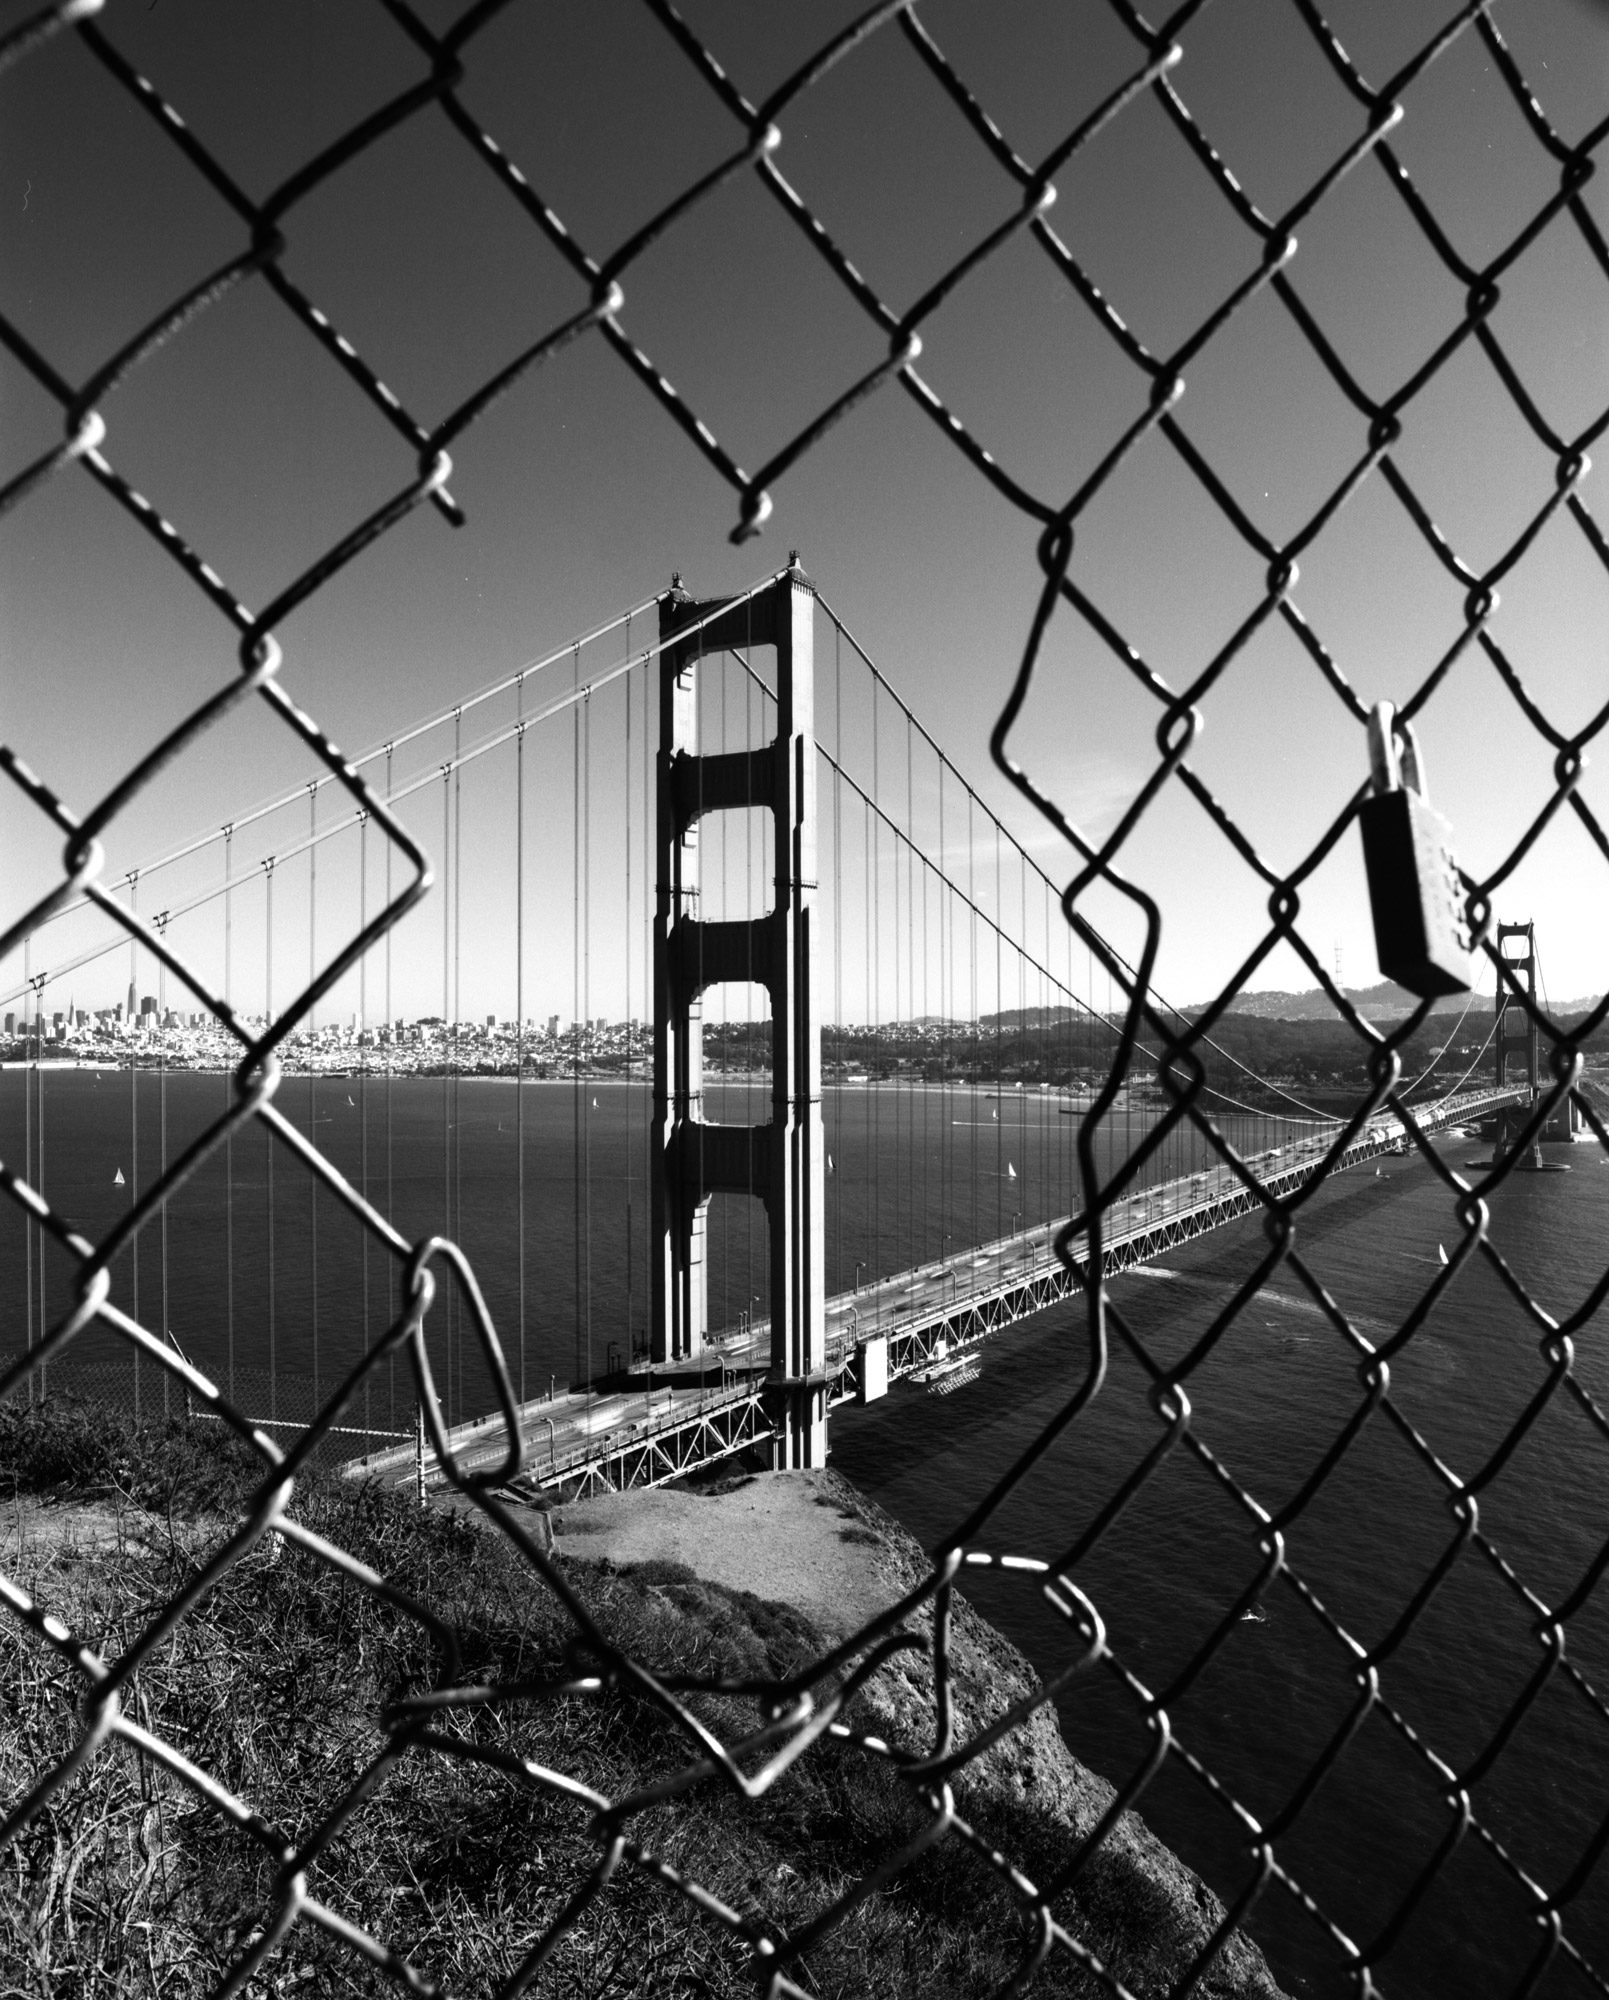
This image was one of the most popular that we shared on our Instagram feed last year so we reached out to @35.raw the photographer behind it to find out more.

TECHNICAL INFO
Film Used: Ilford DELTA Professional 100
Format: 120
Camera: Mamiya RB67
Lens: 50mm
Aperture: F32
Other equipment: Red Filter
Location: San Francisco
Firstly, tell us the story behind this image. What inspired you to shoot it?
One of the first stops we always do when going to the Bay Area is the Golden Gate Bridge, especially this specific vista point. I am always amazed with the bridge and how different the scene is every time we stop by. Sometimes it’s foggy or very windy, but this time it was a beautiful, clear, blue day, perfect to photograph with a red filter to bring out the Looking for a not so typical photograph of the Golden Gate Bridge, I found a cut out of a fenced area with locks and immediately, I imagined the shot. I set it up and waited for the right moment and captured it.
Did you come across any challenges?
One of the main challenges were the visitors. The area I found with the cut off fence was located right on a pathway that visitors were going through to go to another vista point closer to the bridge. As the pathway was very tight, I had to re-compose the shot about 4 times because people wanted to walk through. It was also a challenge not to get as many people in the frame as it is a very popular
What process did you use (Tripod? Set exposure time? Filters? Lighting?)
As I set up my first composition, I was about 10 inches away from the fence. I thought it was perfect and didn’t want to move an inch forward or back. I used a red filter to darken the sky and give it a more moody look. I metered with my Sekonic L-7558DR light meter and added 2 stops to compensate for the red filter.
How did you process it?
I develop my own black and white film at home. This roll was done with developer (8mins), stop-bath (30secs), and fixer (5mins) from Arista The film was dried with a homemade film dryer (35 mins). Then scanned using Epson V600 and added a bit of contrast and sharpness to it. Nothing else was really needed to be done to the scanned image.
What about printing?
Out of the whole roll, I was most excited to go home, develop and enlarge this specific shot. So far, I have only done one enlargement of this picture in my home darkroom with a Beseler Dichro 45, using pearl Ilford Multigrade MGIV RC Deluxe I am planning to make a series of prints sometime in the future.
About The Author

Sergio López Ferrer
Sergio López Ferrer is a central coast California film photographer.
I usually don’t plan trips to go take photographs. Everyone close knows me for being a last minute person and those trips always end up being the best ones. I enjoy taking photographs mainly in film because of the amazing process from loading, taking the pictures, home developing, and home enlarging the final image. This is a very hands-on process of capturing a moment that otherwise is gone. Forever.
Website- www.35raw.myportfolio.com
Instagram- www.Instagram.com/35.raw


